Glass wool insulation has become a cornerstone of energy-efficient construction and renovation. This versatile material offers exceptional thermal and acoustic properties, making it a popular choice for homeowners and builders alike. As the demand for sustainable building practices grows, understanding the intricacies of glass wool insulation is crucial for anyone looking to improve their property’s energy performance.
With its unique composition and impressive insulating capabilities, glass wool stands out in a crowded market of insulation materials. But what exactly makes it so effective, and how does it compare to other options? Let’s delve into the world of glass wool insulation, exploring its composition, installation techniques, and environmental impact to help you make an informed decision for your next project.
Composition and thermal properties of glass wool insulation
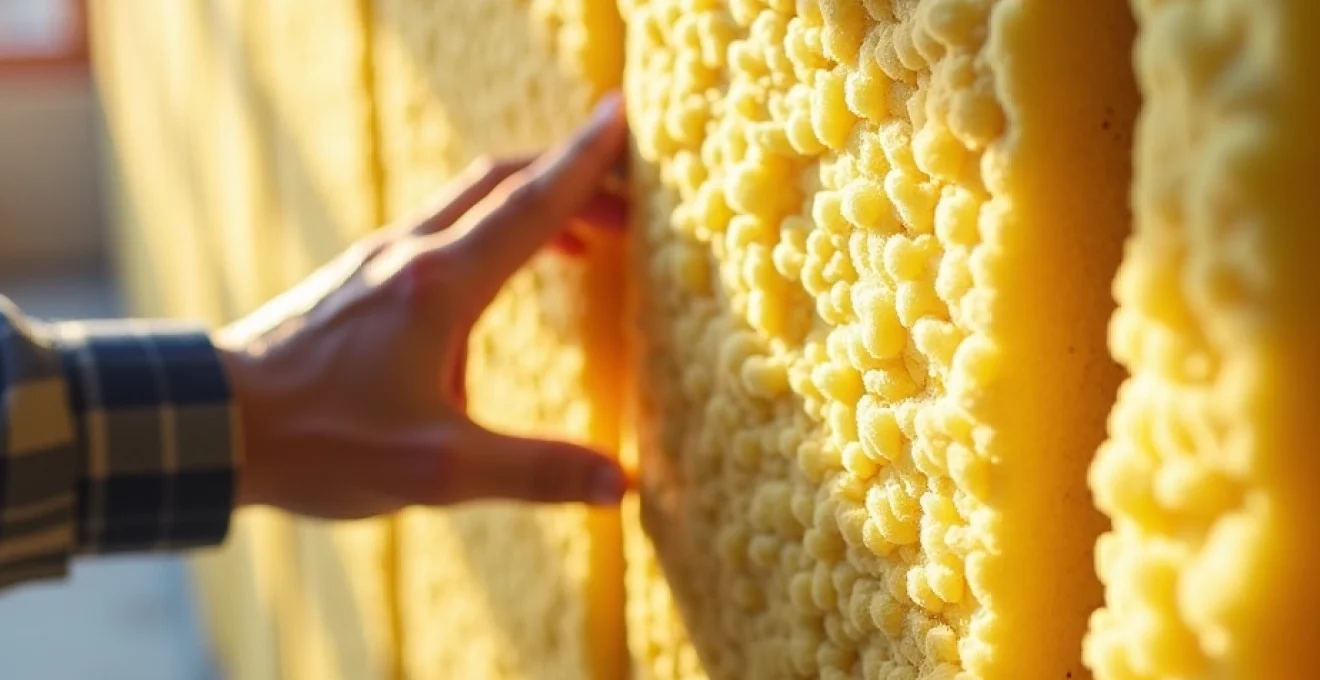
Glass wool insulation is made from recycled glass and sand, melted at high temperatures and spun into fibres. These fibres are then bound together with a resin to create a material that’s both lightweight and highly effective at trapping air. This trapped air is the key to glass wool’s impressive insulating properties, as it significantly slows down heat transfer.
The thermal conductivity of glass wool typically ranges from 0.030 to 0.044 W/mK, depending on its density. This low thermal conductivity translates to excellent insulating performance, helping to keep buildings warm in winter and cool in summer. The effectiveness of insulation is often measured by its R-value, which indicates its resistance to heat flow. Glass wool boasts impressive R-values, making it a top choice for energy-conscious builders and homeowners.
One of the standout features of glass wool is its ability to maintain its shape and insulating properties over time. Unlike some foam insulations that can shrink or settle, glass wool retains its effectiveness for the life of the building when properly installed. This durability contributes to its long-term cost-effectiveness and reliability as an insulation solution.
R-value comparison: glass wool vs other insulation materials
When comparing insulation materials, the R-value per inch is a crucial factor to consider. Glass wool typically offers an R-value of 2.2 to 2.7 per inch, which is competitive with many other common insulation types. Let’s look at how it stacks up against some alternatives:
| Insulation Material | R-value per inch |
|---|---|
| Glass Wool | 2.2 – 2.7 |
| Mineral Wool | 3.0 – 3.3 |
| Cellulose | 3.2 – 3.8 |
| Spray Foam (closed cell) | 6.0 – 7.0 |
| Extruded Polystyrene (XPS) | 5.0 |
While some materials like spray foam and XPS offer higher R-values per inch, glass wool often proves more cost-effective and easier to install, especially in retrofit situations. Its flexibility allows it to conform to irregular spaces, ensuring comprehensive coverage without gaps that could compromise insulation performance.
It’s important to note that the overall effectiveness of insulation depends not just on R-value, but also on proper installation and the specific requirements of the building. Glass wool’s versatility and ease of installation often make it a preferred choice for many applications, despite slightly lower R-values compared to some alternatives.
Installation techniques for optimal glass wool performance
Proper installation is crucial to maximize the benefits of glass wool insulation. The key to success lies in achieving complete coverage without compressing the material, which can reduce its insulating properties. Here are some essential techniques to ensure optimal performance:
- Measure accurately and cut slightly oversized pieces for a snug fit
- Install in multiple layers, staggering the joints to prevent thermal bridging
- Avoid compressing the insulation around electrical boxes or other obstacles
- Ensure a continuous layer of insulation with no gaps or voids
One of the advantages of glass wool is its flexibility, allowing it to be easily cut and shaped to fit around pipes, electrical outlets, and other obstructions. This adaptability helps maintain the integrity of the insulation layer, crucial for its effectiveness.
Vapour barrier placement in glass wool installations
The correct placement of vapour barriers is essential when installing glass wool insulation. In most climates, the vapour barrier should be placed on the warm side of the insulation (typically the interior side in cold climates) to prevent moisture from condensing within the insulation layer. This is crucial because moisture can significantly reduce the insulation’s effectiveness and potentially lead to mould growth.
However, the specific requirements for vapour barriers can vary depending on your local climate and building codes. In some hot and humid regions, vapour barrier placement may differ or may not be required at all. Always consult local building regulations and consider seeking professional advice for your specific situation.
Cutting and fitting glass wool around obstacles
When installing glass wool around obstacles such as electrical boxes, pipes, or framing members, precision cutting is key. Use a sharp utility knife or insulation saw to make clean cuts, ensuring a tight fit around these obstacles. Remember, it’s better to cut the insulation slightly larger than needed and gently compress it into place, rather than leaving gaps.
For irregularly shaped spaces, you can tear glass wool into smaller pieces to fill gaps. This technique, known as “fluffing,” helps maintain a continuous insulation barrier without compromising the material’s performance. Always wear appropriate personal protective equipment (PPE) when handling and cutting glass wool to protect against skin irritation and inhalation of fibres.
Ventilation considerations for glass wool-insulated spaces
Proper ventilation is crucial in spaces insulated with glass wool, particularly in attics and crawl spaces. Adequate airflow helps prevent moisture buildup, which can lead to mould growth and reduced insulation effectiveness. When insulating attics, ensure that soffit vents are not blocked by insulation. Use baffles or vent chutes to maintain an air path from the soffits to the attic space.
In wall cavities, especially in older homes, consider the need for a vapour-permeable air barrier. This can help manage moisture while still allowing the wall assembly to “breathe.” The specific ventilation requirements will depend on your climate, building design, and local building codes, so it’s essential to research or consult with a professional to ensure your insulation strategy includes appropriate ventilation measures.
Dealing with compression: maintaining insulation effectiveness
Compression is one of the primary concerns when installing glass wool insulation. When compressed, the air pockets within the insulation are reduced, diminishing its insulating properties. To maintain effectiveness, follow these guidelines:
- Use the correct thickness of insulation for the available space
- Avoid overstuffing insulation into tight spaces
- When layering, use a thinner layer for the first course to fit around wires and outlets
- In attics, use proper depth markers to ensure consistent coverage
- Consider using special insulation supports in cathedral ceilings to prevent sagging
By following these techniques, you can ensure that your glass wool insulation performs at its best, providing optimal thermal and acoustic benefits for years to come.
Health and safety precautions when handling glass wool
While glass wool is generally considered safe when properly installed, it’s important to take precautions during the installation process to protect yourself from potential irritation. The fibres in glass wool can cause temporary skin itching and respiratory irritation if proper safety measures are not followed.
Proper PPE for glass wool installation
When working with glass wool insulation, always wear the following personal protective equipment:
- Long-sleeved shirts and long pants
- Gloves
- Safety goggles
- Dust mask or respirator
This PPE helps prevent direct contact with the fibres and reduces the risk of inhaling airborne particles. It’s also advisable to work in well-ventilated areas whenever possible.
Dust control measures during cutting and fitting
To minimize dust generation when cutting glass wool, use sharp tools and make clean cuts. Consider using a designated cutting area, preferably outdoors or in a well-ventilated space. If working indoors, use plastic sheeting to contain dust and make cleanup easier. Some professionals use a mist spray bottle to dampen the insulation slightly before cutting, which can help reduce airborne particles.
Post-installation clean-up protocols
After completing the installation, thorough cleanup is essential. Use a vacuum with a HEPA filter to remove any loose fibres or dust. Avoid dry sweeping, which can stir up particles into the air. Dispose of waste materials according to local regulations, typically in sealed bags.
It’s also important to shower and change clothes after working with glass wool to remove any fibres that may have adhered to your skin or clothing. This helps prevent spreading irritants to other areas of your home.
Remember, while these precautions are important during installation, properly installed glass wool insulation poses no health risks to building occupants.
Environmental impact and sustainability of glass wool insulation
Glass wool insulation stands out for its eco-friendly credentials, making it an attractive option for environmentally conscious builders and homeowners. Its production process and lifecycle offer several sustainability benefits:
Recycled content: Many glass wool products contain up to 80% recycled glass, diverting waste from landfills and reducing the demand for raw materials. This high recycled content significantly lowers the carbon footprint of glass wool compared to insulation materials made from virgin resources.
Energy efficiency: The energy savings achieved through effective insulation far outweigh the energy used in production. Over its lifetime, glass wool insulation can save many times the energy used to manufacture it, contributing to reduced carbon emissions from buildings.
Longevity: Glass wool insulation can last for the lifetime of a building when properly installed, reducing the need for replacement and associated waste. Its durability ensures long-term performance without degradation, supporting sustainable building practices.
Recyclability: At the end of its life, glass wool can often be recycled into new insulation products, further reducing waste and environmental impact. However, the availability of recycling facilities varies by region, so it’s important to check local options.
The use of glass wool insulation contributes to green building certifications such as LEED (Leadership in Energy and Environmental Design), helping projects achieve higher sustainability ratings.
While glass wool offers significant environmental benefits, it’s important to consider the entire lifecycle of the product, including transportation and installation impacts. Choosing locally manufactured products when possible can help reduce the overall carbon footprint associated with your insulation choice.
Cost analysis: glass wool vs alternative insulation materials
When considering insulation options, cost is often a significant factor. Glass wool generally offers a balanced combination of performance and affordability, making it a popular choice for many projects. Let’s break down the cost considerations:
Initial investment comparison with mineral wool and cellulose
Glass wool typically has a lower initial cost compared to mineral wool and is roughly on par with cellulose insulation. Here’s a general price comparison per square foot for these materials:
| Insulation Type | Approximate Cost per Square Foot (installed) |
|---|---|
| Glass Wool | $0.80 – $1.50 |
| Mineral Wool | $1.40 – $2.10 |
| Cellulose | $0.80 – $1.20 |
These prices can vary based on factors such as region, project size, and specific product choices. It’s important to note that while glass wool may have a slightly higher upfront cost than cellulose in some cases, its durability and consistent performance over time can make it more cost-effective in the long run.
Long-term energy savings potential of glass wool
The true value of insulation lies in its ability to reduce energy costs over time. Glass wool’s excellent thermal properties can lead to significant energy savings, often paying back the initial investment within a few years. For example, properly insulating an attic with glass wool can reduce heating and cooling costs by up to 15% in some climates.
To calculate potential savings, consider factors such as your local climate, energy prices, and the current insulation levels in your home. Many utility companies offer online calculators or energy audits to help estimate potential savings from improved insulation.
Maintenance and replacement considerations over time
Glass wool insulation requires minimal maintenance when properly installed. Unlike some other insulation types, it doesn’t settle or lose its insulating properties over time, meaning you won’t need to add more or replace it due to performance degradation. This longevity contributes to its cost-effectiveness over the life of the building.
However, it’s important to periodically inspect your insulation, particularly in attics or crawl spaces, to ensure it hasn’t been disturbed by pests or water damage. In the rare event that glass wool insulation does need to be replaced (usually due to external factors like water damage from a roof leak), the replacement process is generally straightforward and can often be done without removing drywall or other finishes.
When considering the overall cost-benefit of glass wool insulation, factor in its durability, consistent performance, and minimal maintenance requirements. While some alternatives might offer slightly lower upfront costs, the long-term value proposition of glass wool often makes it a smart investment for both new construction and retrofit projects.
As you weigh your insulation options, remember that the most cost-effective solution will depend on your specific project requirements, local climate conditions, and long-term energy efficiency goals. Consulting with a qualified insulation professional can help you make the best choice for your unique situation, ensuring you maximize both comfort and energy savings in your home or building.